code
SEO & Google indexation (NextJS)
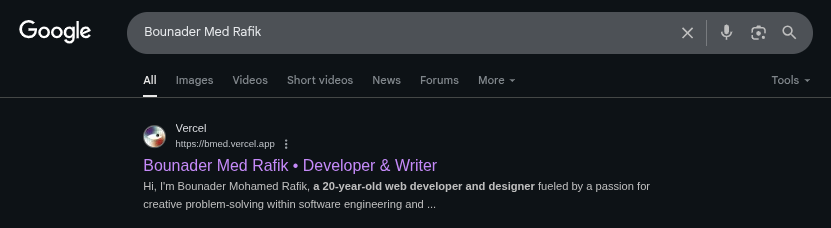
Screenshot of Google searching for "Bounader Med Rafik"
If you’re building a project with Next.js, SEO (Search Engine Optimization) isn’t just an afterthought—it’s what makes your site actually discoverable. In this guide, we’ll break down SEO prep using Next.js built-in features, cover important SEO terminology, and walk you through indexing your project in Google Search Console.
Key SEO Terminologies You Need to Know
Before diving in, here are some terms that will pop up often:
Crawling: Google’s bots (crawlers) go through your site’s pages.
Indexing: After crawling, Google stores your page in its index so it can show up in search results.
Canonical URL: The "main" version of a page if you have duplicates.
Meta tags: Info about your page (title, description, etc.) used by search engines.
Sitemap: A file that lists all the important URLs in your project.
Robots.txt: Tells search engines what they should or shouldn’t crawl.
Preparing Your Next.js Project for SEO
Next.js gives you a ton of tools for SEO out of the box. Here’s how to use them effectively:
Set Metadata with Next.js metadata API
Next.js 13+ has the App Router with a built-in metadata API for titles, descriptions, and more.
Attribute | Description |
| The page’s title that appears in the browser tab and search engine results. Keep it short and descriptive. |
| A short summary of the page content. Search engines often show this under the title in search results (meta description). |
| An array of keywords relevant to the page. Not heavily used by Google anymore, but still useful for other search engines. |
| A nested object defining metadata for social media sharing (Facebook, LinkedIn, Twitter, etc.) using the Open Graph protocol ↗. |
| The title displayed when the page is shared on social platforms. Often matches your main title. |
| The description shown under the title in link previews on social media. |
| The canonical URL of the page. Helps social media and search engines identify the original source. |
| The name of your site shown in the preview (e.g., “My Project”). |
| An array of images used for previews. These show up as thumbnails when your page is shared. |
| The direct link to the preview image. |
| Image width in pixels (recommended: 1200px). |
| Image height in pixels (recommended: 630px). |
| The language/region format of the page (e.g., |
| The type of content (e.g., |
Use Dynamic Metadata for Pages
If you have dynamic routes (like /blog/[id]), use generateMetadata:
Optimize Images with Next.js <Image />
Google loves fast sites. Use Next.js’ <Image> to serve optimized images automatically:
Create a Sitemap
A sitemap helps Google understand your site structure.
Create app/sitemap.ts:
This will automatically serve at /sitemap.xml.
Add Robots.txt
Tell crawlers how to interact with your site.
Indexing Your Project in Google Search Console
Once your site is deployed, you need to submit it to Google.
Go to Google Search Console.
Add a property → Choose Domain or URL prefix.
Domain: Covers all subdomains (
example.com,www.example.com). Requires DNS verification.URL prefix: Covers only the exact URL (easier, just HTML tag verification).
Verify ownership (DNS TXT record, HTML meta tag, or upload file).
Submit your sitemap:
Go to Indexing → Sitemaps.
Enter
/sitemap.xml.Hit submit.
Request indexing for specific pages:
Use the URL Inspection Tool.
Paste your page URL.
Click Request Indexing.
Extra SEO Tips for Next.js
Performance matters: Use
next build && next startto analyze withnext devtoolsor Lighthouse.Schema markup: Add structured data with
JSON-LDto improve rich results.Canonical tags: If you have duplicate content, add
canonicalin metadata.Analytics: Add Google Analytics or another tracking tool to measure traffic.
Wrapping Up
SEO isn’t magic—it’s preparation. Next.js makes it straightforward with metadata, sitemaps, robots.txt, and image optimization. Once you deploy, don’t forget the Google Search Console step—it’s what ensures your project actually shows up in Google search results.